Quilted Oven Mitt Tutorial

Welcome sewing friends! Today I'm going to share an oven mitt tutorial where creativity and functionality come together in a delightful DIY project! Whether you're an experienced sewer or just starting out, crafting your own oven mitt allows you to personalize this essential kitchen tool while adding a touch of homemade charm to your culinary space.
I'll take you through the process of creating a quilted oven mitt that not only provides excellent heat protection but also showcases your unique style. So, gather your materials, thread your needle, and let's stitch up both fashion and function into one cozy oven accessory!

A Few Notes:
This pattern was designed to feature two fabrics, specifically from the Julia collection. However, you can use a single print or create your own patchwork and use the template as you wish.
I have experimented with different thermal linings and for this tutorial I use Insul-Bright. In addition to a layer of Insul-Bright, you will also use a layer of cotton batting for proper protection. Whatever insulated lining you use, make sure to read the manufacturer's instructions carefully because I don't want you to burn your hands!
Download the Template Here
Materials You'll Need:
All fabric for this project should be 100% quilting cotton or heat resistant fabric.
• 11" x 19" exterior fabric
• (2) 7" x 5" pieces for the cuff accent
• (2) 10" x 15" pieces of inner lining fabric
• (2) 10" x 16" 100% cotton batting
• (2) 10" x 16" pieces of heat-resistant batting such as Insul-Bright
• (1) 2" x 5" strip for the hanging loop (optional)
• (1) 2 1/4" x 13 1/2" for the cuff binding
• Coordinating thread
• Quilting ruler
• Rotary cutter or fabric scissors
• Sewing machine
• Walking foot
• Pins or clips
• Iron and ironing board
• Pencil or fabric marker
• Printer and paper for template
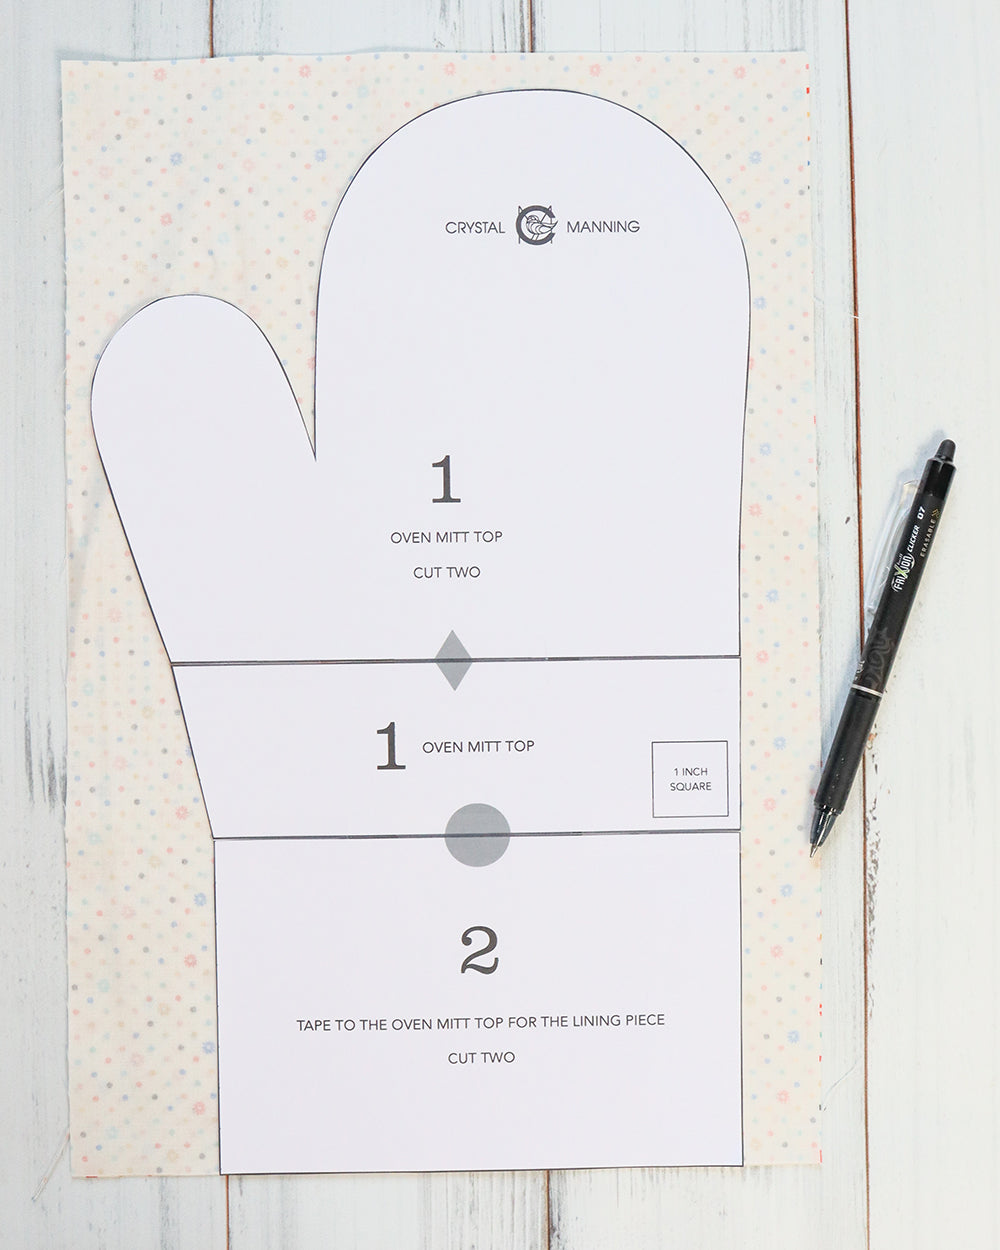
Step 1: Print the Template
Print and cut out the oven mitt template. Make sure your printer is set at 100% and check the 1 inch square for accuracy. Tape the two pieces of the oven mitt top together.

Step 2: Cutting the Fabrics
Take the 11" x 19" exterior fabric piece and fold it in half Right Sides Together (RST). Using the oven mitt top pattern piece, trace and cut two pieces. Next, cut (2) 5" x 7" pieces for the cuff accent.

Tape the bottom pattern piece to the top of the oven mitt to make the lining template. Next, take the two 10" x 15" lining pieces and put them (RST). Trace and cut out the lining pieces.

Step 3: Sew the Oven Mitt Top and Cuff Accent Together
With RST sew the oven mitt top and cuff accent together with a 1/4" seam allowance. Press seams to the bottom.

Step 4: Quilting
It's time to make a quilt sandwich! Layer the fabrics in this order: exterior fabric, Insul-Bright, cotton batting. There isn't a right or wrong side to Insul-Bright. Pin the layers together and quilt using straight lines, diagonal lines, or any quilting design you prefer. Repeat for the second side.

Tip: Remember to increase your stitch length and use the walking foot for pretty quilting stitches. I use 2.8mm stitch length on my machine.


Step 5: Sewing the Mitt:
Place the quilted outer fabric pieces RST, match the cuff seams and clip around the edges. Sew the mitt together using a 1/4 inch seam allowance, leaving the bottom open. Backstitch at the beginning and end for added durability. When you get to the area between the hand and the thumb, sew an inverted curve. I mark a sewing line to help with accuracy and go slow.
Tip: Reduce your stitch length to 2.0mm. This will tightly hold all your layers together and make your oven mitt durable.


Step 7: Sew the Lining Pieces
Take the two lining pieces and place them RST. Pin and sew around the perimeter with a 1/4 seam allowance, leaving the bottom open.

Step 6: Trim and Clip
Clip the fabric around the curved edges and corners to reduce bulk and help the mitt lay flat when turned right side out. Carefully clip up to the stitching in between the hand and thumb. Do not cut through the stitching.

Carefully turn the exterior oven mitt right side out through the bottom opening. Use a pencil or blunt object to gently push out the corners for a neat finish. Now give it a good press!
Step 8: Sew the Oven Mitt and Lining Together
Now we're going to hide the inside seams by inserting the lining. Place the lining on your hand and push it inside the oven mitt, wrong sides together. Match up the thumb and align the bottom edges and side seams. Clip the layers together and sew around the bottom edge of the oven mitt using a basting stitch with a 1/4" seam allowance.

Step 9: Add a Hanging Loop (Optional)
Fold the 2" x 5" strip of fabric in half lengthwise (wrong sides together) and press. Open and fold the long raw edges to the center and press again. Fold in half and press again to make a 1/2" x 5" strip. Topstitch along both long edges, about 1/8" from the sides of the loop.


Fold the loop in half and pin it near one of the side seams on the outside of the oven mitt, lining it up with the opening edge. Stitch in place.

Step 10: Add Binding to the Cuff
Fold the 2 1/4" by 13 1/2" binding strip in half lengthwise (wrong sides together) and press. Open the strip and place the short ends right sides together. Sew the short ends with a 1/4" seam allowance. Press the seam open. Refold the binding so the raw edges are together.

Turn the mitt inside out. Place the binding around the opening of the oven mitt and clip in place, lining it up with the sewn edges. Match the seam on the binding to one of the seams on the mitt. Sew around the cuff with a 1/4" seam allowance.


Turn the oven mitt right side out. Flip the binding around to the outside and press. Pin the binding in place. Sew close to the binding edge for the finish!


Congratulations! You've successfully sewn a functional quilted oven mitt. Remember, practice makes perfect, so don't worry if your first attempt isn't flawless. My second oven mitt naturally turned out better than the first. Now bake some cookies and enjoy using your handmade oven mitt! Be sure to gift them to friends and family as well.

