Garden Society Cheater Print Projects
I'm continuing to share Garden Society projects this week. Today I wanted to highlight the patchwork cheater prints in the collection because they can be used in so many fun ways.
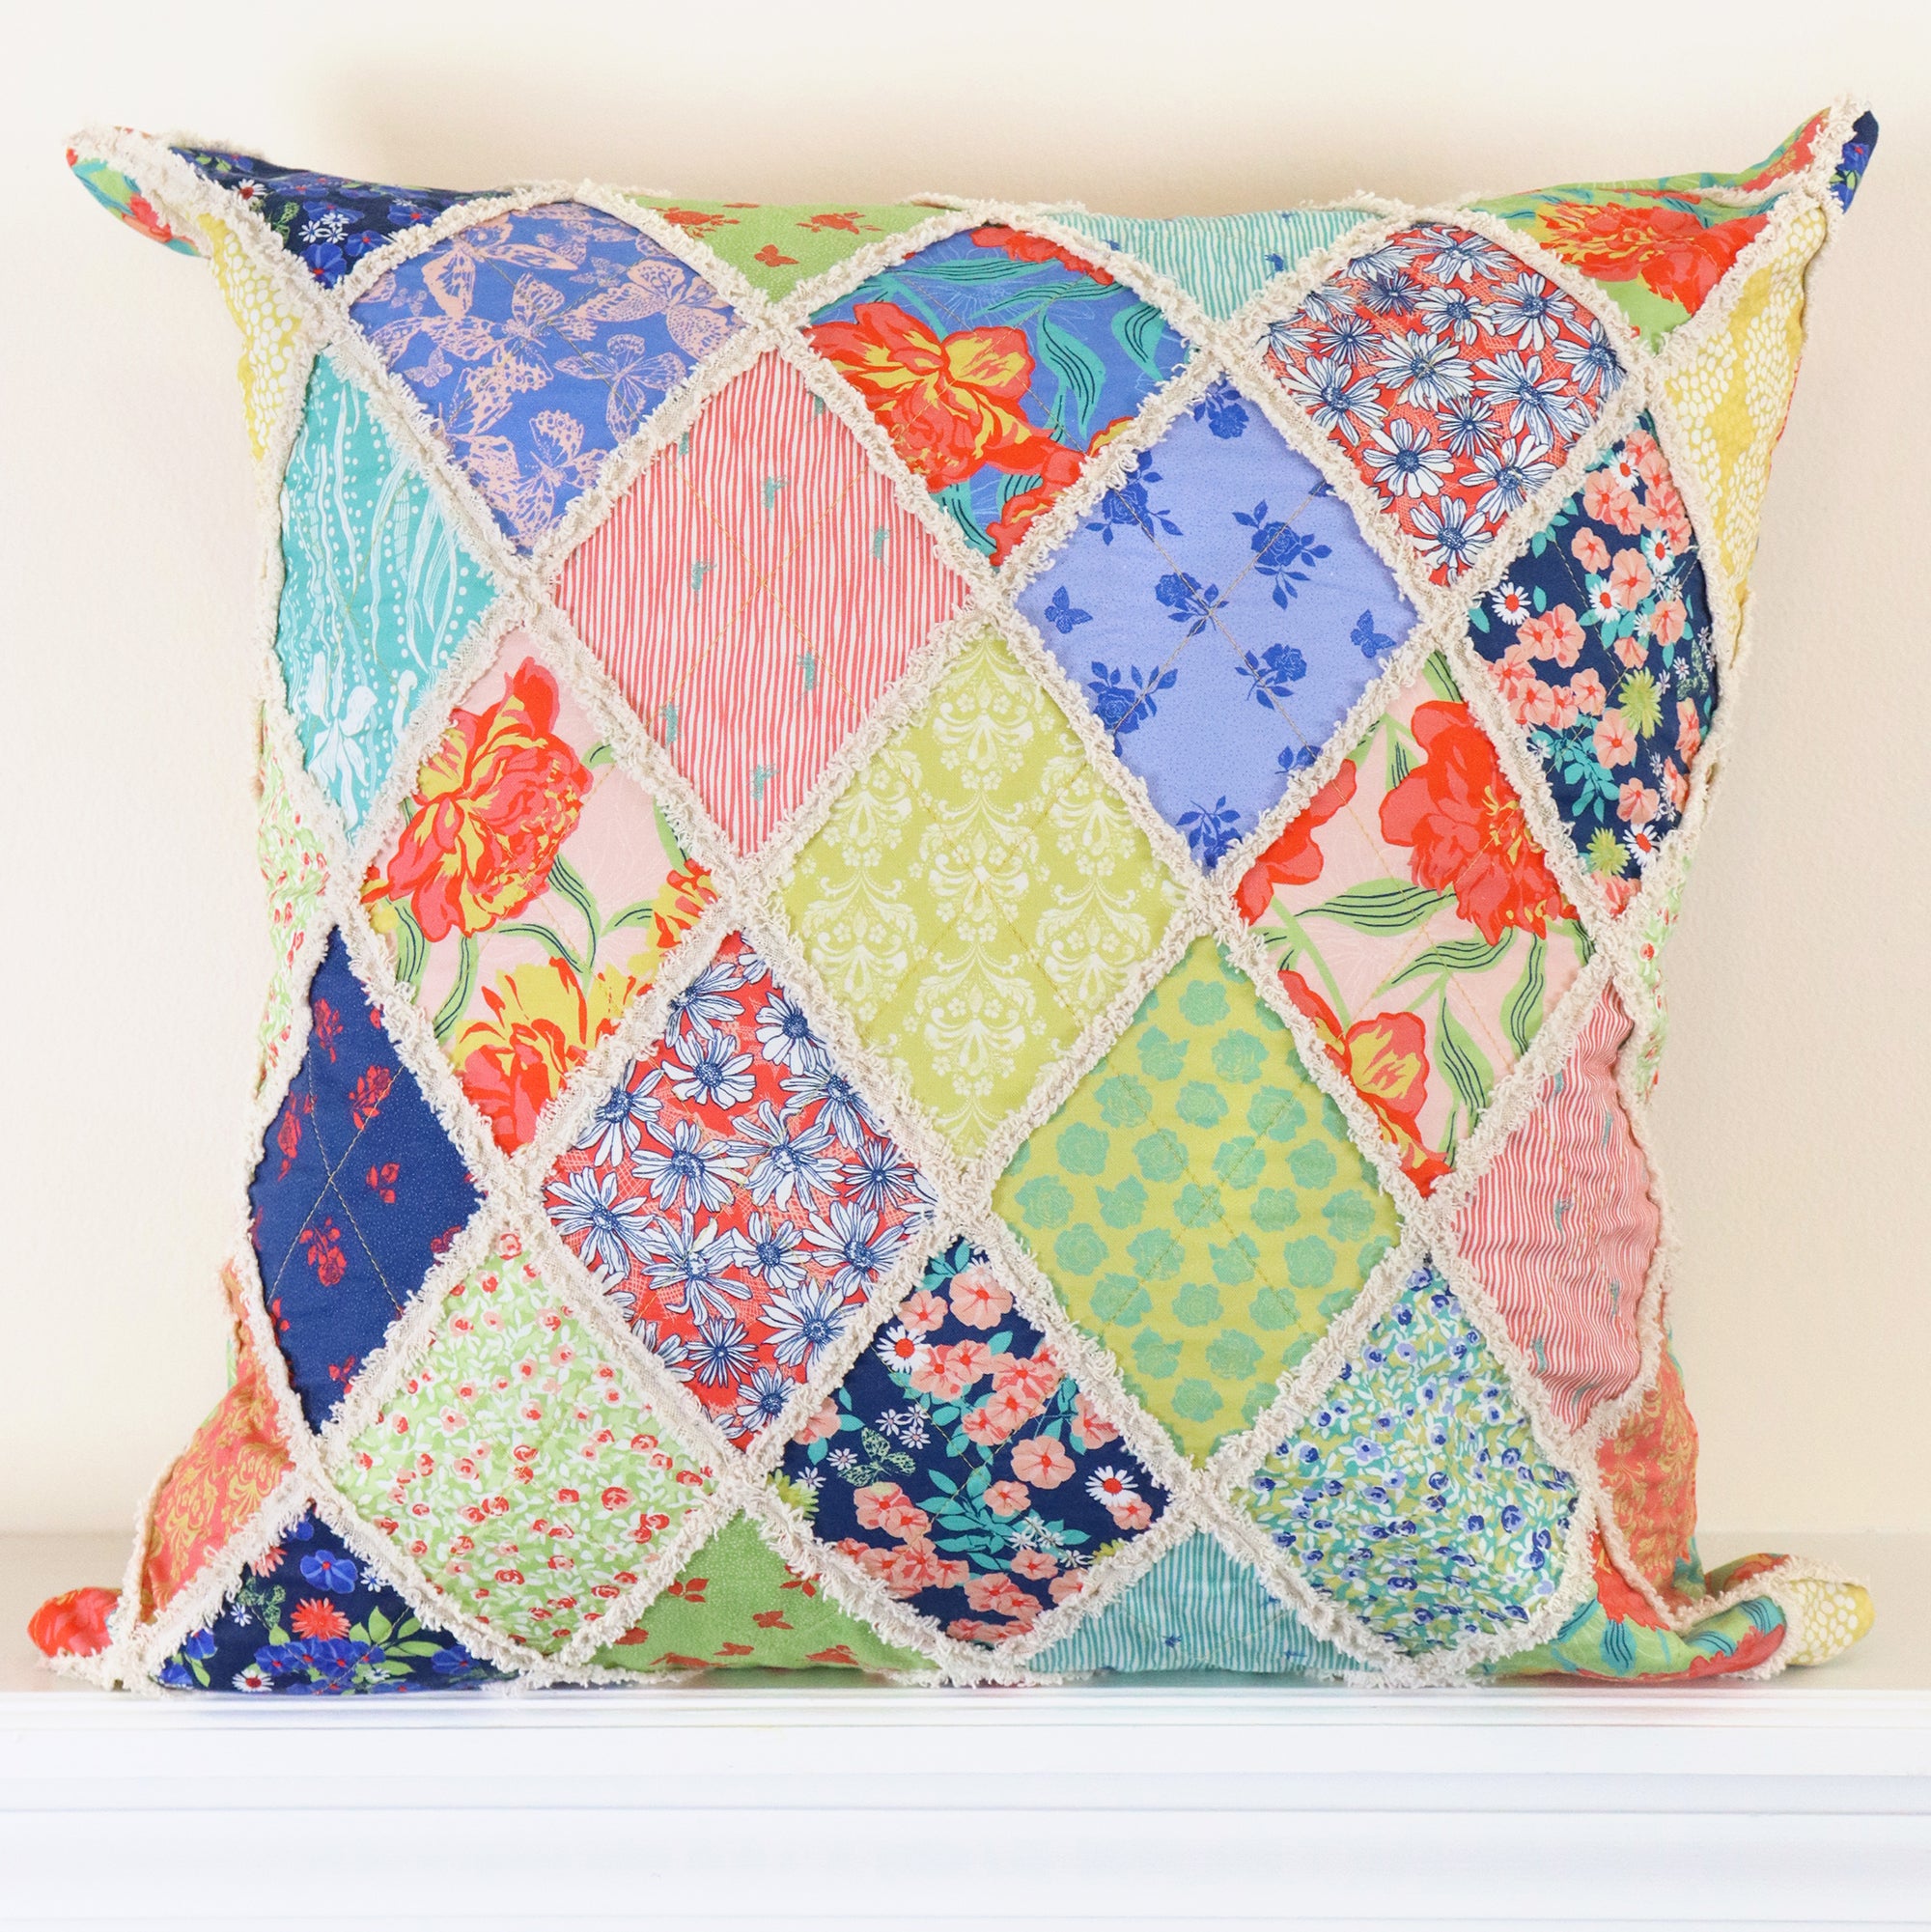
Patchwork Chenille Pillow
Most recently, I finished a throw pillow embellished with Chenille-it . If you haven't used Chenille-it before, a pillow top is a perfect beginner project and then you will be addicted just like me! Here are the supplies that I used:
• 5/8 yard 11898-13 Rainbow Patchwork from Garden Society by Moda
• 5/8 yard 11890-17 Peony Blooms (backing)
• 5/8 yard Pellon SF101 Shape-Flex (To give the backing a home dec weight)
• One roll 3/8" Chenille-It in Natural
• 18" invisible zipper
• 23" square of batting
• 20" square pillow form
• Coordinating thread
• Spray baste
Notes: If you want to make two matching 20" x 20" pillow covers, you have enough yardage and bias tape with these supplies. You will need:
1 1/4 yard of Pellon SF101
2 - 23" square of batting
2 - 18" invisible zippers
2 - 20" square pillow forms
Tip: The nylon invisible zippers can be trimmed to size. I had a longer invisible zipper for garment sewing that I used. Just remember to do a little zig zag stitch over the teeth at the end before you cut it.

Quilt and Embellish the Pillow Top with Chenille-it
1. Cut a 21" square from the patchwork print and then baste it to the 23" square of batting.
2. Quilt diagonal lines in the center of the diamonds, going both directions on the patchwork print.
3. Sew on the Chenille-It bias strips on the patchwork lines, working one direction at a time. When you are finished, each diamond will have a bias strip border and the quilted lines will cross in the center.
4. Once you have the Chenille-It sewn to the pillow top, follow the instructions on the package to get the blooming frayed effect. You can throw it in the washer but I had a stiff brush and water bottle that I opted to use. After all the strips are frayed, put the pillow top in the dryer with some damp towels.
5. When your pillow top is dry and bloomed to perfection, trim to a 21" square.

Assemble The Pillow Cover
6. Cut a 21" square from the backing fabric and apply the SF101.
7. Install the invisible zipper at the bottom edges of the pillow front and back using a zipper foot.
First press out the coils on the invisible zipper so they are flat. Use clips to secure the zipper right sides together with the pillow front and back. Sew into the groove next to the zipper teeth on each side.
8. Use clips to match the pillow front and back right sides facing. Make sure the zipper is halfway open. With a 1/2" seam allowance sew around the pillow starting at the bottom just before the zipper stitches end. Pivot at the corners.


9. Clip the corners. Turn your pillow cover right side out and push out the corners. Insert the pillow form and enjoy!
Tamarack Jacket by Grainline Studio
If you have some garment sewing experience, then it's time for you to make a quilted jacket. I used the Tamarack Jacket pattern by Grainline Studio which is for advanced beginners. For this pattern, you will cut out your pattern pieces and make a quilting sandwich for each pattern piece. After you've done that, you quilt each piece before assembly. However, you still need to pre-wash before you begin.
With the patchwork print, your quilting lines are already there for you which is very convenient. This is the second jacket I've made and using the cheater print makes the process go faster. Another benefit is that you don't have to cut up one of your gorgeous quilts to make the jacket.
My Garden Society jacket features print 11898-11 Patchwork Navy. For this version, I chose not to include the welted pockets. I have the snaps to add on but when I was finished, I was pleased with the way it looked without them.
Check with your local quilt shop, they may have this pattern available in print. If not, you can purchase it online at Grainline Studio. You can also find a wonderful tutorial that I recommend for your first time making the jacket.
Here are the links:
Tamarack Jacket Pattern: Sizes 0 - 18 Sizes 14-30
Tamarack Jacket Tutorial


Poolside Tote by Noodlehead
Who doesn't love a fun tote to take on a picnic or vacation? This tote is very roomy, so if you think you could be stranded on an island, rest assured that all your necessities can fit in here.

Since this version is made with quilting cotton, I used interfacing with Soft and Stable to give the bag structure and it's stable enough to stand on its own. This is all explained very well in the instructions and you will need to purchase more interfacing for the quilting cotton version. Please read the pattern carefully before gathering your supplies.
Once you have your outer panels interfaced and basted to the Soft and Stable you can quilt the patchwork print before assembly!
Here is the link to the pattern:
Poolside Tote Pattern by Noodlehead
My sample features 11898-13 Rainbow Patchwork from the Garden Society Collection.
Rayons are next!! Stay tuned for some garments in my next post.